
Recientemente Power BI ha actualizado la biblioteca para el intérprete Jupyter Notebook y gracias a esto conseguiremos crear un informe de Power BI desde Jupyter Notebook en cuestión de segundos. En este artículo se detalla cómo importar las librerías necesarias, conectarse a Power BI y crear un informe a partir de un Excel. Revisa la especificación del entorno antes de realizar el paso a paso de este artículo para asegurarse del buen funcionamiento.
Especificaciones del entorno
- Windows 11
- Python 3
- Jupyter Notebook
Paso a paso
Instalar Power BI Client
Instala el cliente de Power BI desde la línea de comando de Windows. Abre tu consola y escribe el siguiente código:
pip3 install powerbiclient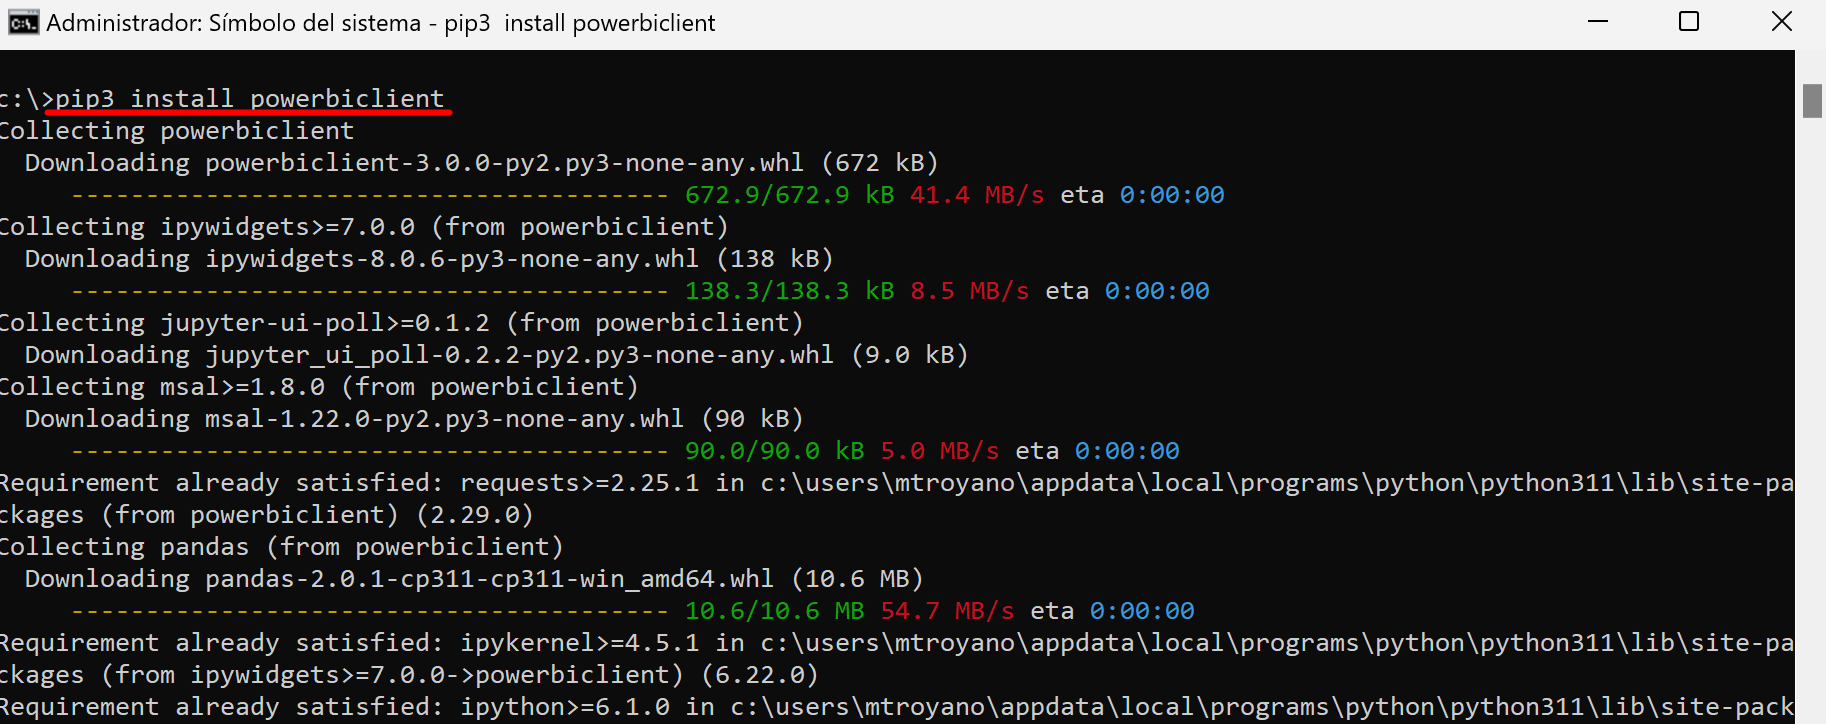
Crear cuaderno en Jupyter Notebook
Ahora que hemos instalado el cliente de Power BI es el turno de abrir Jupyter Notebook.
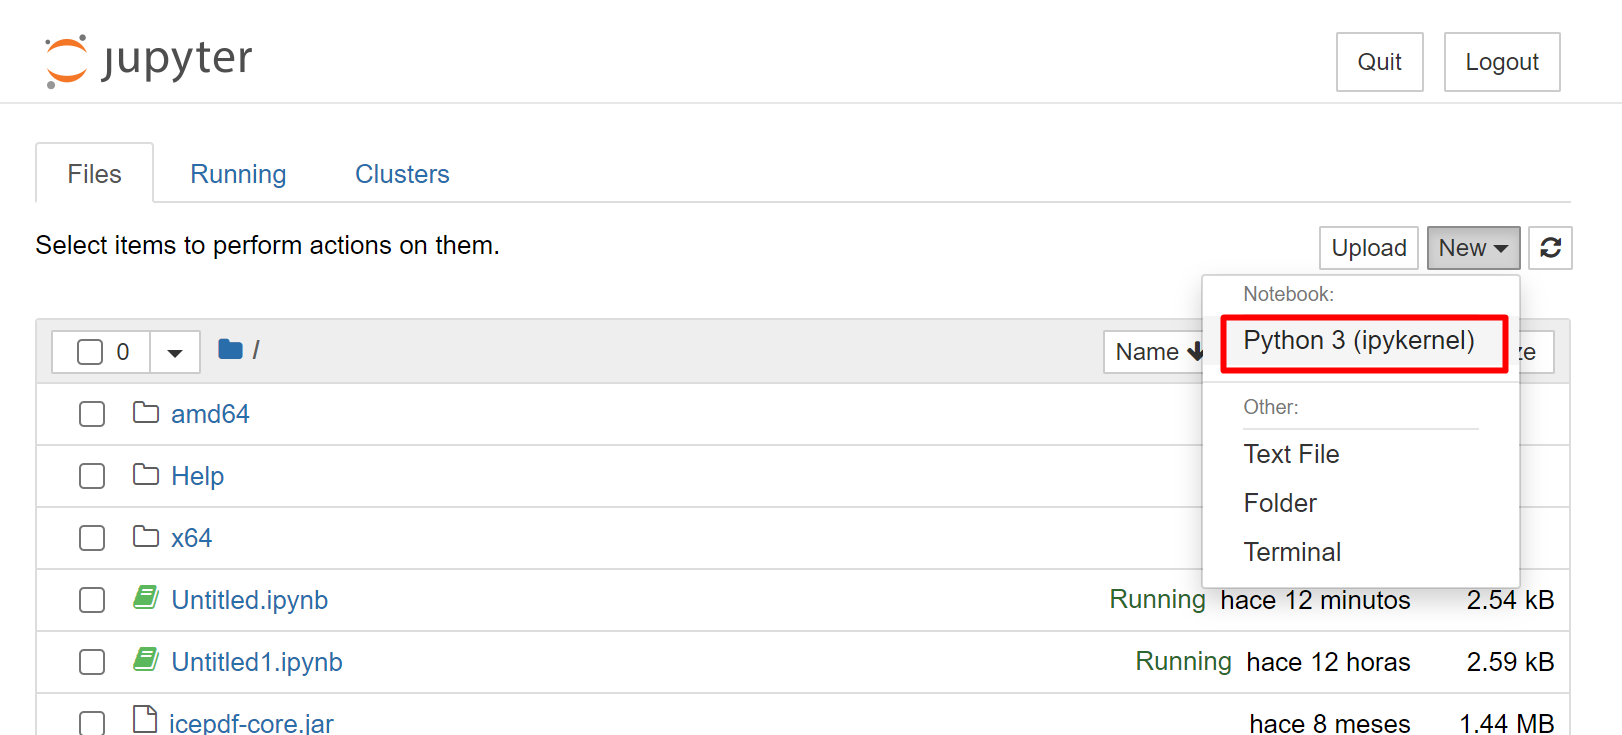
- Abre una línea de comandos y escribe Jupyter Notebook.
- Se te abrirá el navegador donde debes hacer clic en el botón New situado en el margen derecho.
- Selecciona Python 3 (ipykernel)
Escribe tu código
Importa a tu notebook los módulos relevantes del paquete de Power BI e importa pandas para trabajar con DataFrames. El código debe ser similar al siguiente:
# Importar librerias
from powerbiclient import QuickVisualize, get_dataset_config, Report
from powerbiclient.authentication import DeviceCodeLoginAuthentication

import pandas as pd
Ejecuta el código anterior e inserta una nueva celda en tu cuaderno para crear un dataframe leyendo de un excel. En mi ejemplo el fichero Excel esta ubicado en C:/tmp/
# Crear dataframe de excel
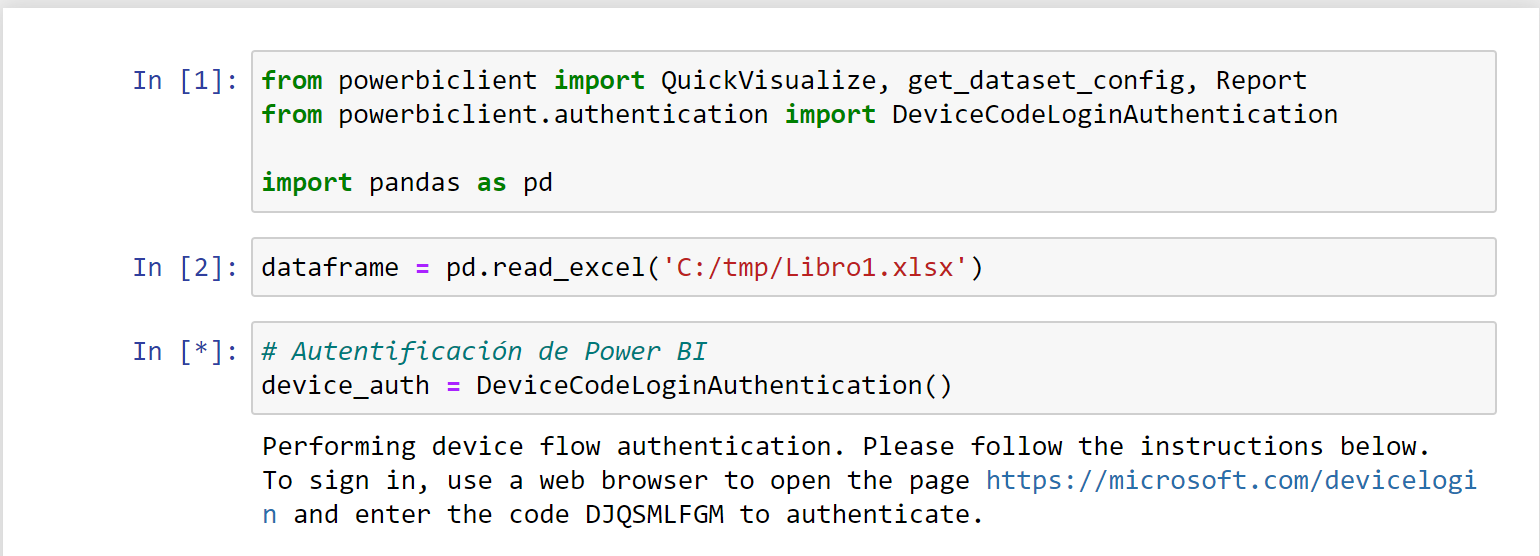
dataframe = pd.read_excel('C:/tmp/Libro1.xlsx')Ejecuta el código anterior y escribe en una nueva celda el siguiente código para conectarte a Power BI.
# Autentificación de Power BI
device_auth = DeviceCodeLoginAuthentication()
Ejecuta el código anterior. Al ejecutar, te pedirá que hagas clic en el enlace, que escribas un código y te autentifiques. Una vez autenticado podrás cerrar la pestaña abierta y volver a nuestro cuaderno. Ejemplo:
Ahora crea una nueva celda con el siguiente código para crear el informe automático y visualizarlo en el mismo cuaderno.
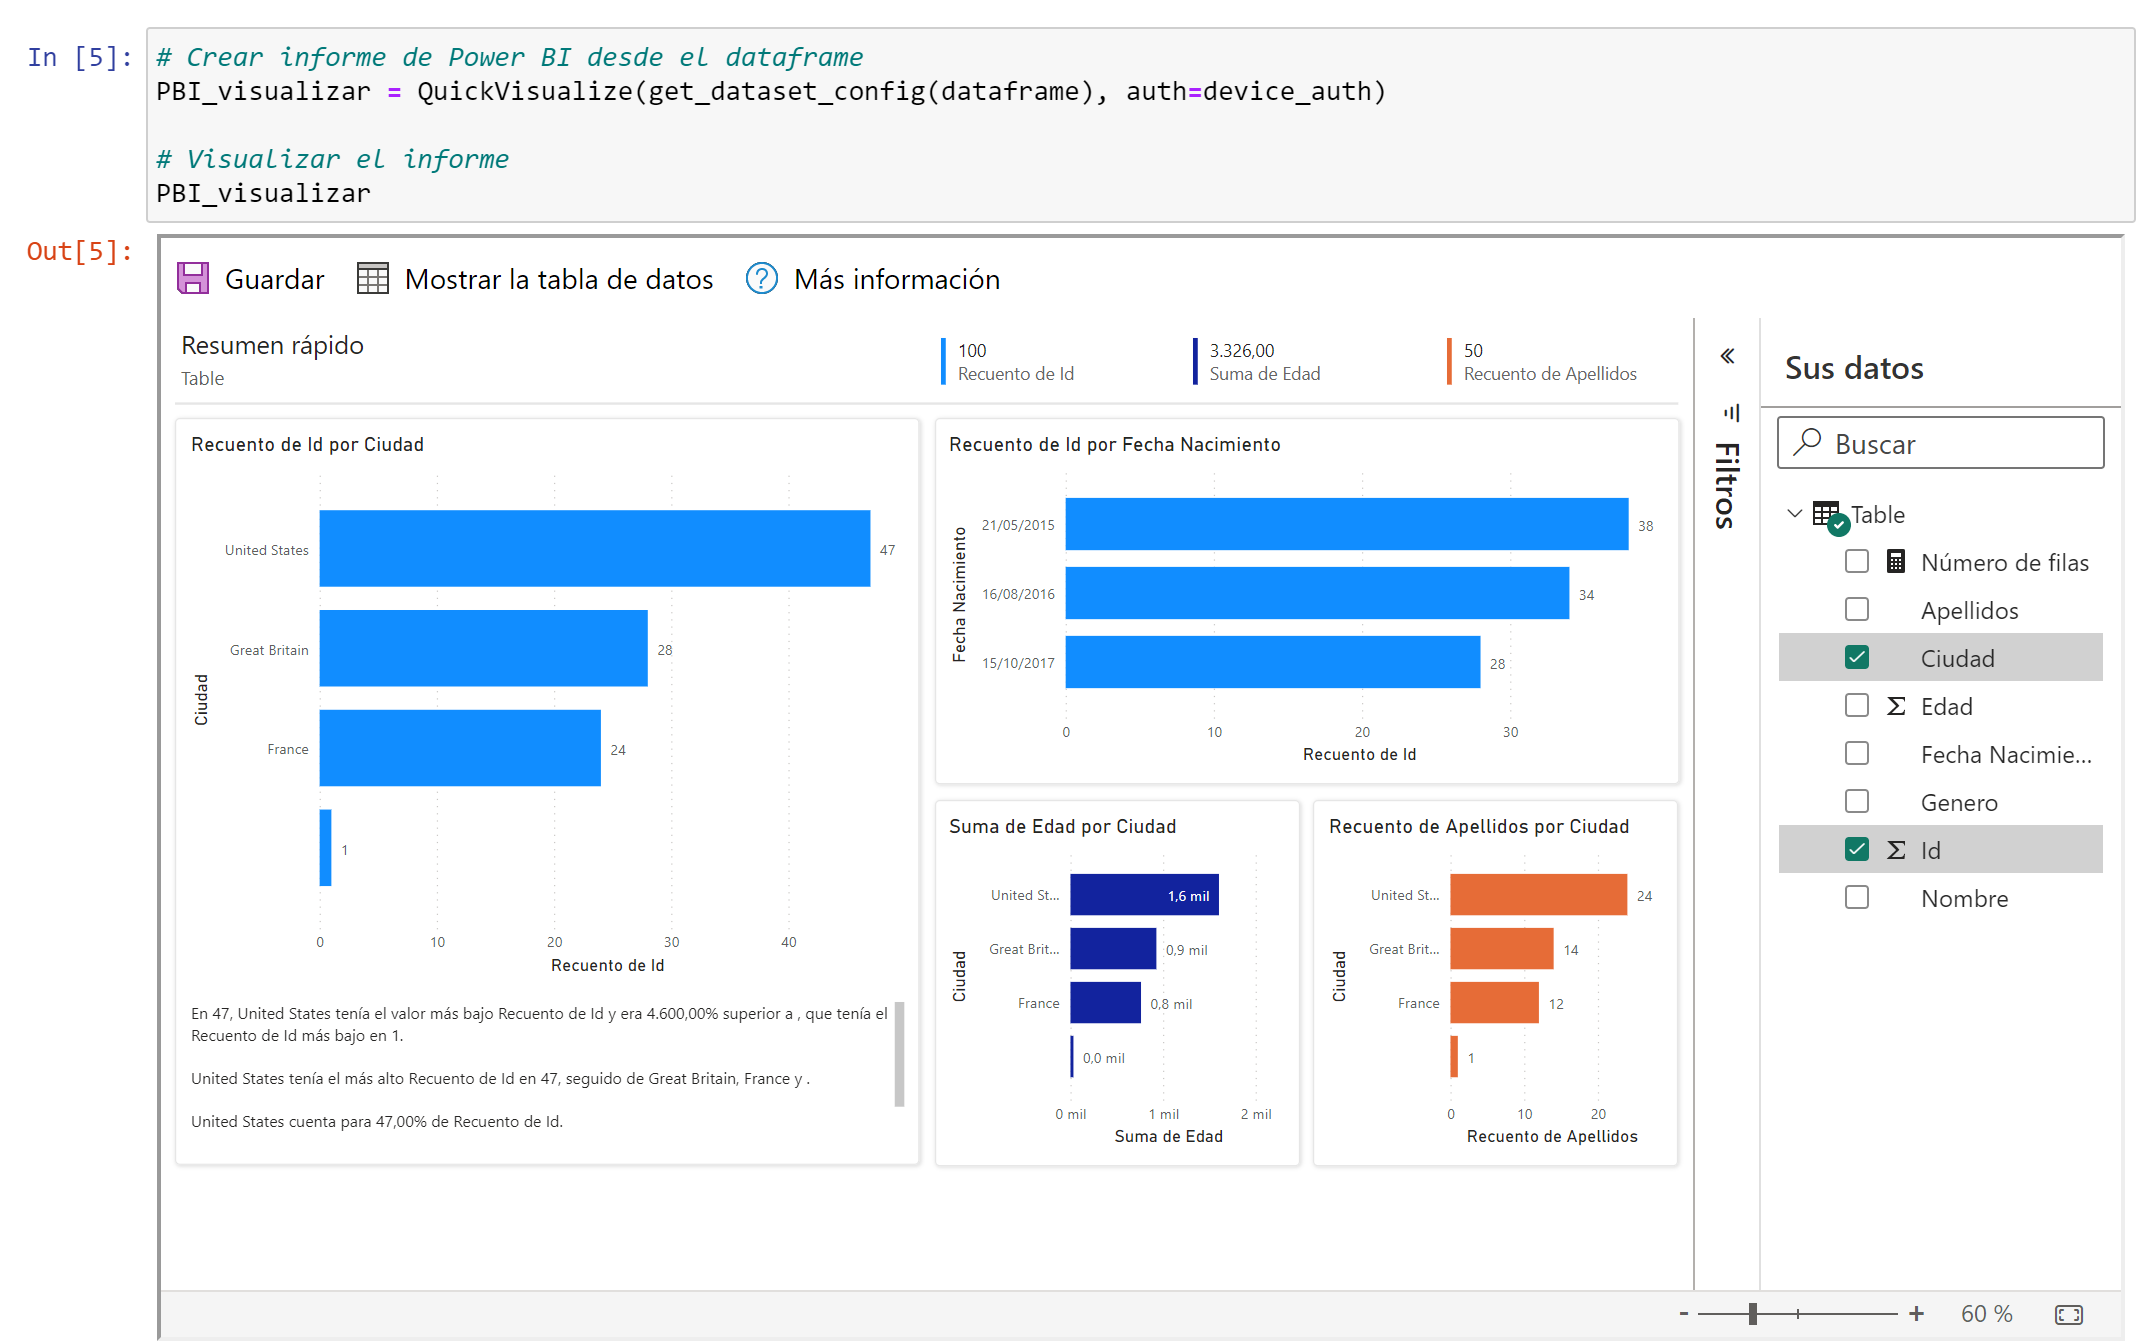
# Crear informe de Power BI desde el dataframe
PBI_visualizar = QuickVisualize(get_dataset_config(dataframe), auth=device_auth)

# Visualizar el informe
PBI_visualizar
Al ejecutar el código anterior verás el informe automático de Power BI y podrás guardarlo.
Código completo
# Importar librerias
from powerbiclient import QuickVisualize, get_dataset_config, Report
from powerbiclient.authentication import DeviceCodeLoginAuthentication

import pandas as pd

# Crear dataframe desde excel
dataframe = pd.read_excel('C:/tmp/Libro1.xlsx')

# Autentificación de Power BI
device_auth = DeviceCodeLoginAuthentication()

# Crear informe de Power BI desde el dataframe
PBI_visualizar = QuickVisualize(get_dataset_config(dataframe), auth=device_auth)

# Visualizar el informe
PBI_visualizar
¿Qué te ha parecido? Escríbeme un comentario con tu opinión.